Showing posts with label recipe. Show all posts

Wednesday, August 15, 2012

Happy Birthday, Julia - Cherry Clafoutis

Friday, July 13, 2012...in my little red kitchen I stared down at one of the saddest baking attempts I've done since I started my blog. It was the day before the next San Diego Food Blogger's meeting and it was declared that there would be extra points if you could make something in honor of Bastille Day. I'll be honest with you...I had to look it up Bastille Day. Hmm....I didn't know much about French food so dessert it is. Back to the internet and I finally decided on a cherry clafoutis (cla-foo-tee) because in the end, I wanted to have an excuse to buy a bag of pricey cherries. I gathered my ingredients and made my atttempt at making a random French ,dessert which I had never even tried before. It wasn't an epic fail (it actually tasted really delicious) but in looks, it was definitely a fail. I brought a creamy avocado dip and pita chips to the meeting...hehe.

So what is a clafoutis? The best way to describe it is a cross between a pancake and a flan. Juding by all the receipes I found, there are several versions but most were pretty basic and straighforward. Traditionally it's made with unpitted cherries to give it an almond-like flavor but I decided I better pit mine. Let's just say my hands were a little stained afterwards. As I said, I enjoyed the flavors of the failed clafoutis so I knew I would eventually revisit it again in the future.

I would try it a lot sooner than expected. A little birdie had emailed me and told me about a local restaurant that was holding a special dinner for Julia Child's 100th birthday. I honestly haven't thought much about Julia Child in recent years but I do have memories of sitting on my grandmother's couch and watching cooking shows like In Julia's Kitchen with Master Chefson PBS *gasp* pre-Food Network. I can tell you I am no expert at French cuisine and I can only dream to master a few French pasteries. When she wrote Mastering the Art of French Cooking, Julia introduced Americans to fine dining and that as long as you liked to cook or wanted to learn to cook, you could do it. Today is Julia Child's 100th birthday in in the spirit of wanting to learn how to cook/bake, I decided to try the clafoutis a second time.
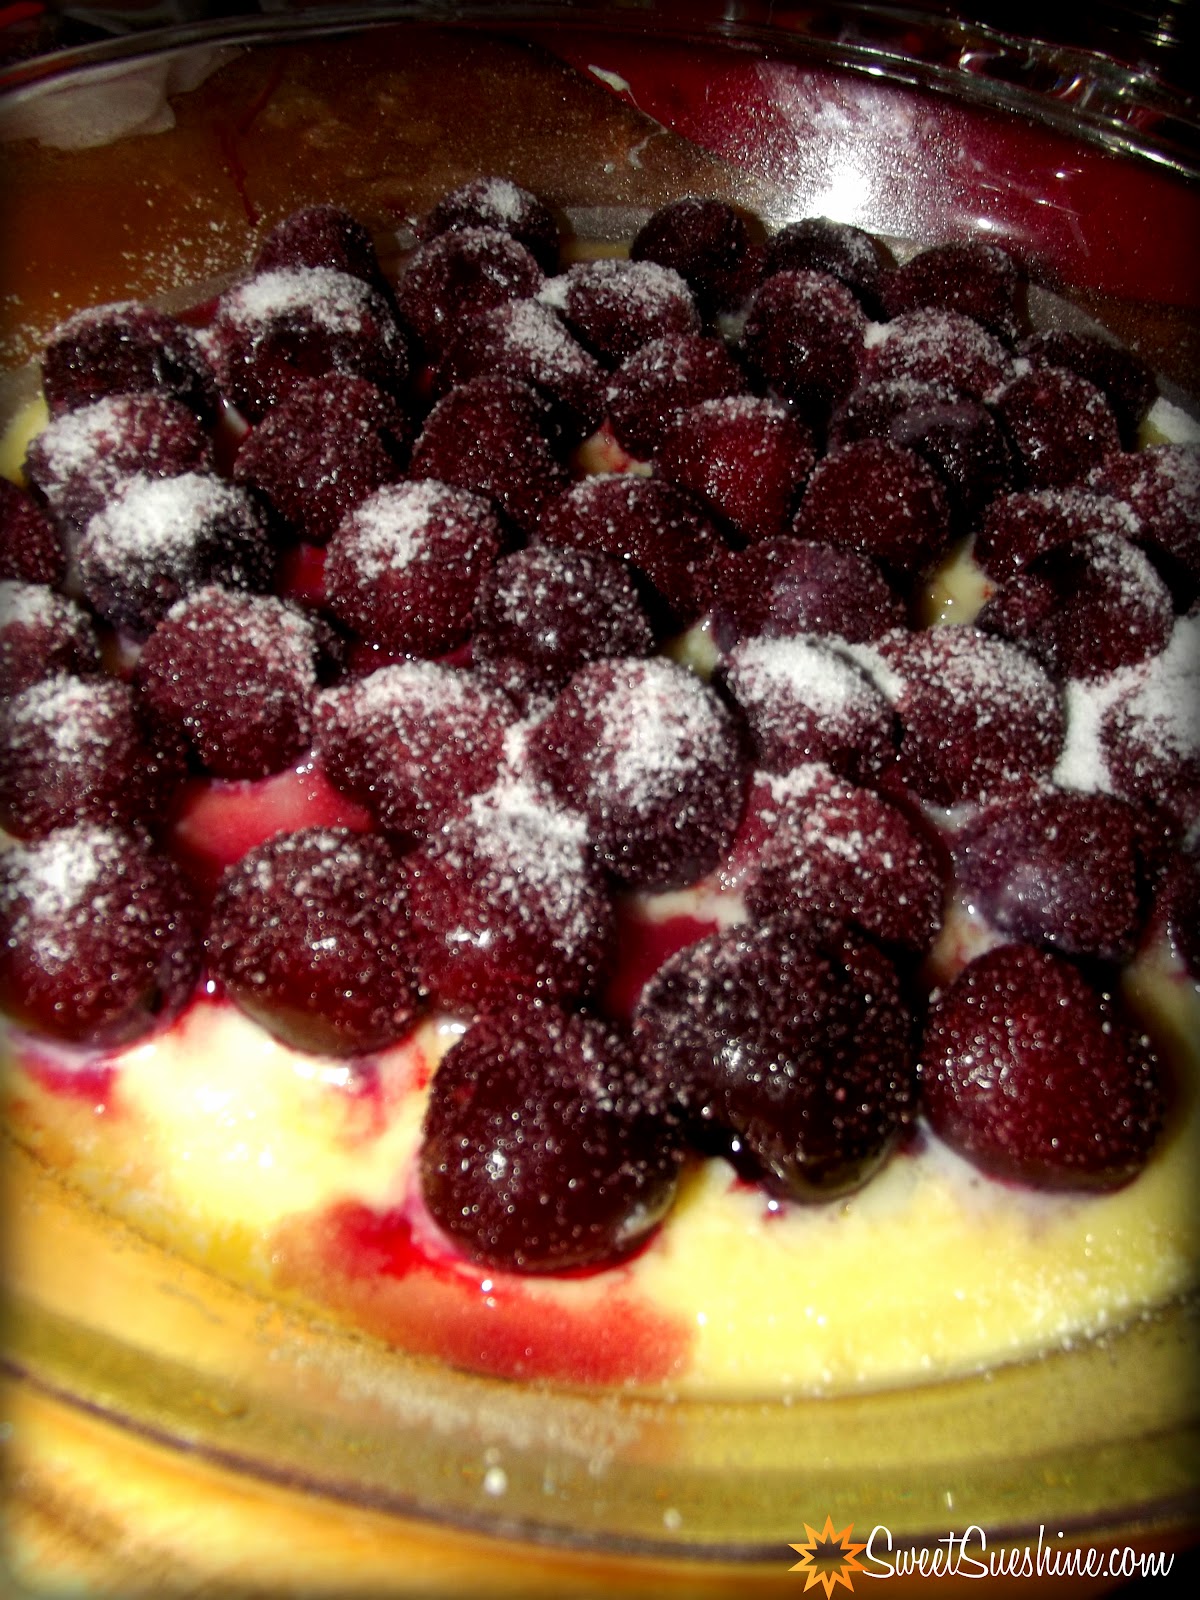
Julia Child's Cherry Clafoutis
from Epicurious.com
Preheat oven to 350 degrees F.
Using a blender, combine the milk, 1/3 cup sugar, eggs, vanilla, salt and flour, and blend.
Lightly butter an 8-cup baking dish, and pour a 1/4-inch layer of the blended mixture over the bottom. Set remaining batter aside.
Place dish into the oven for about 7-10 minutes, until a film of batter sets in the pan but the mixture is not baked through. Remove from oven (but don’t turn the oven off, yet).
Distribute the pitted cherries over the set batter in the pan, then sprinkle with the remaining sugar. Pour the remaining batter over the cherries and sugar.
Bake in the preheated oven 60 minutes, until the clafouti is puffed and brown and a knife inserted into the center comes out clean.
Sprinkle with powdered sugar and serve warm.


As I've stated in previous posts, I will always be honest with you when I try baking something new. I'm not a professionally trained baker or a master at pasteries...I'm just an everyday at home baker, learning as I go. I think a lot of you are in the same boat as I am. The cherry clafoutis didn't turn out super pretty (better than my original attempt though) but it was so good. Mine did not turn out puffy like a pancake but leaned more towards a firm custard which I believe I prefer. The tart cherries were a contrast to the sweet eggy batter and I had to stop myself from spooning more into my mouth. Who knows why my clafoutis turned out the way it did...maybe it was my sugar (I used C&H Light which is a sugar/stevia blend and not an exact measure to real sugar) or maybe it was my baking dish (glass) or it could even be my oven. Either way, I'm glad I tried again and I'm sure I will try it a third time later down the road. In Julia's words:

"Maybe the cat has fallen into the stew, or the lettuce has frozen, or the cake has collapsed. Eh bien, tant pis. Usually one's cooking is better than one thinks it is. And if the food is truly vile, then the cook must simply grit her teeth and bear it with a smile, and learn from her mistakes."

Happy 100th birthday, Julia! All the chefs, bakers, and everyday cooks that you have inspired thank you. Bon Apetite!


Sunday, November 13, 2011

Prescription for Pie & Mama's Pie in the Sky 2011


"With Thanksgiving coming up, don't deny yourself a piece of pie. Just don't keep going back for more and you'll be fine." -Dr. K
Me to my husband: "My doctor prescribe that I can have pie!

~~~
Okay, well not exactly. Of course, the husband didn't buy it so just like so many things that I REALLY want, I had to make it. I scoured the Internet for an easy pie recipe because this was going be the first time I had ever baked a pie from scratch. When I found a recipe for pecan pie, I was surprised to find that it didn't call for corn syrup because it's what gives pecan pie that sticky texture and sweetness that makes your jaw ache. I made a few adjustments to the recipe and this is what I came up with.

No Corn Syrup Pecan Pie


  • 1 cup light brown sugar substitute
  • 1/4 cup white sugar substitute
  • 1/2 cup butter or margarine, melted
  • 2 eggs
  • 1 tablespoon all-purpose flour
  • 1 tablespoon milk
  • 1 teaspoon vanilla extract
  • 1 cup chopped pecans
  • 1 ready made 9-inch, deep dish pie shell (by all means, make your own pie crust if you know how! I'm still taking baby steps with pie making)


  • Preheat oven to 350 degrees F (175 degrees C).
    In a large bowl, beat eggs until foamy, and stir in melted butter. Stir in the brown sugar, white sugar and the flour; mix well. Last add the milk, vanilla and nuts. Pour into an unbaked 9-in pie shell. Bake in preheated oven for 10 minutes at 400 degrees. Tent the pie edges loosely with foil then reduce temperature to 350 degrees. Bake for 30 to 40 minutes, or until done. The center will move slightly but will firm up as it cools.


    Adapted from www.allrecipes.com

    I had a tough group of judges that Thanksgiving. A few of my family members grew up in the South and I wasn't sure if they were going to like this version of pecan pie. Initially, I only told my mom that I hadn't used real sugar or corn syrup. I tend to do that some times....not tell people that its "reduced sugar" or that I used sugar substitutes because they instantly give me that face that reads: "there is no way this is going to be good." I quietly sat as everyone ate my pie. I think they noticed that it didn't have the texture of a regular pecan pie. Unfortunately, I had over baked it. It was a little dry and turned out to be more like pralines but they still complimented it. When the pie tin was almost empty, that's when my mom let everyone know how I had made the pie and everyone was surprised. I've been getting requests all year to make the pie again for Thanksgiving. On Sunday afternoon, I made it again as a practice run for this Thanksgiving and it turned out much better...more like a traditional pie. Too bad my family knows my secret now.

    ~~

    Are you in need of a pie for Thanksgiving but don't have time to make one from scratch? Why not order a pie from Mama's Kitchen (http://www.mamaskitchen.org/) for $20? Mama's Kitchen is holding their annual event, Mama's Pie in the Sky. They hope to sell more than 6,250 pies before Nov. 20, which will raise $125,000 and fund nearly 40,000 meals delivered to San Diegans who have HIV/AIDS or cancer.

    Here's how Mama's Pie in the Sky works:

    1. Visit www.mamaspies.org to purchase the Thanksgiving pies of your choice: apple, pumpkin, pecan, or no sugar added apple pies. If you have a friend or colleague selling pies, choose their name. Otherwise you can just purchase from Mama's Kitchen directly.

    2. Select a convenient pick-up location. The pies will be available for pick-up at one of 19 Wells Fargo Bank branches throughout San Diego County or at Mama's Kitchen, located at 3960 Home Avenue, San Diego, Calif. 92115.

    3. Go to the location you selected on Wed., Nov. 23 between 10 a.m. and 4 p.m. to pick up your pie(s) from one of our volunteers. When you open your pie, you'll discover what baker prepared your pie.

    4. To purchase a pie that will be hand-delivered to Mama's Kitchen's clients on Thanksgiving morning, select the "Love-A-Client" option. For every "Love-A-Client" pie purchased, the donor will receive an entry to win a 64MB iPad2.

    There's even something for us diabetics with the no sugar added option. How awesome is that? So many great companies, caterers, bakeries, and individual bakers, including the San Diego Food Blogger's very own Jenny Williams from http://www.jennywennycakes.com/ (maybe you'll get one of her pies!) are participating in this amazing event. You too can participate by purchasing a pie for a great cause. Hurry because the last day to place your order is November 20th. What are you waiting for? Thanksgiving just wouldn't be complete without pie.


    Thanks to Scatena Daniels Communications for providing the press release from Mama's Pie in the Sky 2011.

    Monday, July 4, 2011

    Red, White, Blue, and Cake


    I hope everyone is having (had) a great 4th of July. I should have planned this better to have this post up before the 4th of July but I think I got distracted with the fact that I actually had a 4 day weekend from work! And for once, this workaholic actually relaxed a bit. I hadn't planned to bake this weekend but if you know me, I can't sit still for long. I wanted to make something other than the go to flag pound cake or a parfait. On Sunday, I decided I wanted to try out a recipe that I found a few months ago that got me curious. I thought Independence Day would be a fun way to try this one out....a poke cake.

    So what is poke cake? Poke cake is a simple way to dress up your cake without decorating and change the flavor without making your own cake from scratch (although you can make your own cake for this if you really wanted to). I just wanted to share something that was fairly quick and easy that any casual baker can make. Poke cake can be made with box cake mix and a large box of flavored gelatin. Here's how:

    Patriotic Poke Cake

    1 pkg. (2-layer size) white cake mix (plus ingredients listed on box)
    2 cups  boiling water
    1 pkg. (large) Jell-o Berry Blue Flavor Gelatin
    1 tub (8 oz.) COOL WHIP Whipped Topping, thawed
    1 package fresh strawberries, sliced


    Follow directions for box cake.
    Place 2 baked 9-inch round cake layers, top side up, each in clean 9-inch round cake pan. Pierce cakes with large fork at 1/2-inch intervals.
    Stir boiling water into JELL-O Gelatin in medium bowl at least 2 min. until completely dissolved. Carefully pour gelatin evenly over cake layers. Refrigerate 3 hours.
    Dip one of the cake pans in warm water 10 sec.; unmold onto serving plate. Spread with about 1 cup of the whipped topping and add sliced strawberries. Unmold second cake layer; carefully place on first cake layer. Frost top and side of cake with remaining whipped topping. Top with additional strawberries. Refrigerate at least 1 hour or until ready to serve. 

    Source: adapted from Kraftrecipes.com

    Final result

    Sueshine Notes about Poke Cake:
    1) Have fun with the Jello flavors and toppings. I picked Berry Blue, white cake, and strawberries because I wanted a red, white, blue theme. You can even do one layer one flavor and the second layer a different color.
    2) Don't be afraid to pour in all the Jello. I was a little wary of pouring in all the liquid because it's a lot of liquid and I thought it would make my cake soggy. Do it. My cake did not have that many blue streaks throughout the cake because I only used half.
    3) This can be made to be diabetic friendly. This is one of the first recipes that you can find most of the ingredients in sugar free or reduced sugar ready-made. Pillsbury is currently the only mainstream company that makes a sugar free boxed cake available in your local grocery story. Their yellow cake can be used for this recipe. Jell-O makes several of their flavors in sugar free form and it does not taste any different. Cool Whip comes in regular, sugar free, lite, and fat free so you have a few options there.

    My first poke cake was pretty fun to make and it's so easy that I whipped it up in a few hours. I've also seen different versions of poke cake made with pudding so this cake is something I want to revisit in the future with a diabetic friendly version. I hope everyone had a wonderful holiday weekend. I'm off to enjoy my last few hours of relaxation and watch some fireworks with my hubby :)

    Wednesday, June 22, 2011

    Here Comes the Cookie

    Love seems to be in the air in 2011. A few of my friends and family members have either just got engaged or just got married. My eldest cousin got engaged in February, one of my close high school friends got married last month, and one of my old co-workers also got married last month. Several old friends, classmates, and acquaintances on Facebook have also announced they were planning weddings this year.When my second cousin got engaged this past weekend, I decided to look for a recipe that would be wedding themed. Apparently, the recipe has been staring me in the face for several months. I love making my own frosting so I go through A LOT of powdered sugar. On the back of the 2lb C&H powdered sugar bag is a recipe for Mexican Wedding cookies.

    According  to http://www.ehow.com/: "The ingredients of a wedding cookie traditionally are the richest butters, sugars and oils to signify blessings for a rich and full married life. The powdered sugars are said to have at one time represented purity." These cookies are also known as Italian Wedding cookies or Russian teacakes.

    I didn't follow the recipe on the back of the powdered sugar bag because it said it makes 5 dozen cookies. Yikes, I didn't think I need that many cookies, especially since it was my first time making them. I looked all over the Internet and the majority of recipes have the same ingredients and preparation...all very easy. Since this cookie has everything that isn't good for me, I made a variation of several recipes using ingredients that would cut back on the fat but not the flavor.


    Mexican (or Italian) Wedding Cookies

    3/4 cup butter or 3/4 margarine, unsalted, room temperature (I used Smart Balance 50/50 butter blend)
    1/2 cup powdered sugar + 1/2 cup for dusting
    (to make your own: 3/4 cup Splenda granular, 2 tbsp cornstarch. Grind in blender to fine texture. Makes 1 cup of powdered sugar) 
    1/2 tsp salt
    1/2 cup almonds, ground (this is traditional but you can also use pecans)
    1 tbsp vanilla
    1 1/2 cups all purpose flour, sifted


    Preheat oven to 325F.
    Cream butter in bowl. Slowly blend in powdered sugar and salt. Mix in almonds and vanilla.
    Slowly add sifted flour and mix well until dough forms. Place in fridge for 5 minutes.
    Scoop 1 tsp balls onto a greased cookie sheet. (Can also be formed into crescents)
    Bake for 18-20 minutes. Do not brown.
    Allow cookies to cool before rolling in powdered sugar (if rolled before cooling, the powdered sugar will become moist and make the outside doughy). Makes about 40 cookies.


    I was a little worried that my choice in butter would affect the taste because this is pretty much a butter cookie and usually the real thing tastes the best. The Smart Balance butter blend was surprisingly good. According to the box, it has 28% less saturated fat, a good source of vitamin E and Omega-3, and no trans fats (I might be using this for more recipes in the future). I took a bite of the cookie and my reaction was, "wow, that was damn good." It's buttery and sweet but it's also light. The Mister kind
    of gave me an odd look when I had that reaction...then I gave him one. He said the same exact words I did. At first I thought he was playing with me and imitating me (one of his favorite past times) but he said he wasn't kidding. It's good to know I can still surprise him with my baking even after almost 4 years of marriage :)

    As wedding season continues, I want to congratulate a few people.

    Newlyweds Tara and Andrew
    Newlyweds Amy and Tyler
    Recently engaged Kristeen and Aramis
    Recently engaged Katherine and Joey

    .....And to anyone else that is entering into a long life of married bliss!

    Blog dedicated to my groom and best friend, Scott Babb <3


    Sunday, June 12, 2011

    Biscotti on the Brain

    Do you ever feel like the universe is trying to tell you something?

    After a long day at my regular 9-5, the last thing that has been on my mind is baking. Or so I thought. A couple of weeks ago, I had my first real cake order which was quite a learning experience and a little stressful to be honest with you. So after I completed that order, I wanted to take a little break. Apparently my brain had other ideas because for the next 3 nights, I dreamt about baking. It wasn't one of my normal baked items either...it was biscotti. Then I started to notice the biscotti in the coffee shops. Then in the cookie aisle in the grocery store. Hm, biscotti would be really good with this coffee....but of course I can't have it because it has tons of sugar. Okay okay fine, I'll make my own.

    One of the first times I tried biscotti was when my mom was in culinary school. I use to watch her make it and it always seemed so complicated to me so I've never tried making my own. When I finally gave into my subconscious, I went in search for a pretty basic recipe because I didn't know what I was doing. Biscotti is out of my realm of cake products. There are a lot of recipes for biscotti on the Internet and most have your basic items....some kind of nut and some kind of dried fruit. So among the hundreds of recipes on the Internet, one stood out: Oreo Biscotti

    Let me go on a slight tangent here. When I got diagnosed with diabetes, I looked high and low for items that would satisfy my sweet tooth. Most of the time, I was really disappointed because most sugar free items taste a little off. Oreo cookies are the exception. I must say that sugar free Oreos are BETTER than the real thing. They taste just like regular Oreos but for some reason they are crisper therefore making them taste fresher....like they haven't been sitting on the grocery store shelf forever. When I found the Oreo biscotti recipe, I was all over it.


    Oreo Biscotti

    1 cup Splenda
    1/3 cup  butter or margarine, soften to room temperature
    3 eggs
    2 tsp.  vanilla
    3 cups flour
    1-1/2 tsp.  baking powder
    1/4 tsp. salt
    16   OREO Cookies, coarsely chopped (about 2 cups)
    1 cup of Hershey's sugar free chocolate chips (optional)

    Preheat oven to 350°F. Mix sugar, butter, eggs and vanilla in large bowl until well blended. Sift flour, baking powder and salt in a separate bowl. Add dry ingredients to the wet ingredients in 3 portions...mixing after adding each portion. Stir in chopped cookies. Divide dough in half. Shape each half into 9x3-inch loaf on lightly greased baking sheet with floured hands.
    Bake for 25 to 30 minutes or until golden brown and toothpick inserted in centers comes out clean. Remove from oven; cool 10 minutes. Cut each loaf diagonally into 16 (1/2-inch-thick) slices. Place slices, cut sides up, on same baking sheet. Bake an additional 10 to 12 minutes on each side or until lightly toasted on both sides. Cool completely on wire rack.
    Melt chocolate chips. Dip half or drizzle chocolate onto cooled biscotti. Place on wax or parchment paper to dry. Store in air tight container.

                                                                                              Source: http://www.kraftrecipes.com/

    So here's my advice on working with this recipe cause I ran into a few speed bumps.
    1)Obviously, I changed a couple of the ingredients to be a little more diabetic friendly.
    2) The original recipe says to melt the butter....don't melt the butter. Butter should be soft when you are baking and still creamy when you are mixing in the sugar. The butter shouldn't melt into the dough until you are actually baking it. I don't know if this is technically correct because I'm not "professionally trained" but I know from experience.
    3) The dough is going to be dry. I had the hardest time trying to make it into a loaf. If your biscotti loaf looks lumpy, it's OK. I promise it will come together...just be patient with it. In the end, it will be worth it.
    4) Tip for the chocolate. I did not have a microwave safe bowl deep enough to dip my biscotti in so I took my angled spatula, dipped it in the chocolate, and spread it along the bottom side of the biscotti. This helped get a thin, even coating of chocolate that doesn't overpower the rest of the biscotti.

    Final product with a cup of strong coffee :)
    Speaking of coffee to go with your yummy biscotti, I wanted to make a quick mention of an awesome coffee place in the Mission Valley area called Cuppa Cuppa (http://www.cuppacuppa.com/). I work in the area and discovered this place about 4 years ago when I didn't feel like driving to one of the 4 Starbucks in the area, wait in line, and be late for work. Cuppa Cuppa is a drive thru espresso bar that specializes in local coffee(slogan is "Be Independent, Drink Local"), baked items, and fruit smoothies. The staff is super nice, really fast, and you can tell they appreciate your business. The coffee is incredible and strong. My usual orders are a sugar free vanilla latte or a chai latte and just like the sugar free Oreos, I cannot tell the difference. They always have special drinks up on their bulletin board and sometimes they correspond with the holidays (ie The Irishman, Peeps Mocha). The cost is about the same as the chain coffee shops but here, you know you are going to get a consistantly good cup of coffee. Don't forget to get your punch card if you become a regular.  Try it out...I promise you'll like it.

    My current punch card with the doggy bone hole punches. Three more to go!!
    Address and hours listed.

    Sunday, April 17, 2011

    Oh Pastry...How I Miss Thee!!

    Do you remember the old Meryvn’s commercials with the woman who is standing outside before the store is open and she’s pressing herself against the glass doors, chanting “open open open”? Sometimes I feel like that woman but instead I’m standing in front of the glass doors of the Von’s pastry cabinet. Like her, I can’t have what I want the most.
    When people find out that I'm a diabetic, they tell me they would never be able to deal with not eating their favorite sweets. A lot of people ask me what sweets I miss the most since being diagnosed as a diabetic. Cake is and always will be number one but breakfast pastries are a very close second. Since I'm not willing to give up sleep in the morning, I don’t have time to make myself a high protein breakfast like my doctor and nutritionist encourage me to eat. So what's left when you are in a rush....donuts, muffins, bagels, pop tarts, danishes....all things that are so accessible but so forbidden for me to eat. So once again I was faced with the same dilemma that I had with cake….I had to learn to make it myself and find some alternatives. About 2 weeks ago, I had the most intense craving for something very specific: almond pastry. The almond pastry in the Von's pastry cabinet was taunting me with its flaky goodness, sugary icing, smooth almond filling, and crunchy toasted almonds. My daydreaming of each of the individual components of the pastry made me think: Actually, this wouldn’t be too hard to make myself. Then I started to look at the other items in the case: chocolate croissant (yup I can make that), muffins (not a pastry but of course I could make those), donuts (err, that’s a tough one). With all this hard thinking and trying to figure out ingredients and how to do it easily and quickly, this is what ultimately inspired puff pastry week.

    Almond Pastry Bites
    puff pastry, almond paste (not marzipan) or almond pie filling (can), 1 egg, 1 tbsp water, sliced almonds


    Cut puff pastry dough into small 3 inch squares. Place 1/2-1 tsp of almond paste or almond pie filling in the center of the square . Fold one corner of the square to the opposite corner (like a turnover). Beat egg and water in a small bowl to make an egg wash. Brush on the top of the pastry with the egg wash. Sprinkle sugar or sugar substitute over egg wash and place almond slices on top. Bake at 400 for about 15 minutes or until golden brown.

    (Sueshine Note: almond filling can be replaced by any flavor pie filling such as apple or cherry or any fruit preserve to make a turnover. Just be mindful of the sugar content. Smuckers has several sugar free or no sugar added flavors)

    Chocolate croissants
     puff pastry, sugarfree chocolate squares, 1 egg, 1 tbsp of water
    Cut puff pastry dough into long triangles (like the ready made Pillsbury croissant dough in the tube). Place chocolate square on the wide side of the triangle and roll, tucking the end  in the middle of the croissant. Curve ends into a crescent. Beat egg and water in a small bowl to make an egg wash. Brush on the top of the croissant. Bake at 400 for about 15 minutes or until golden brown. Drizzle with melted chocolate.


    One of the hardest things to recreate is a donut. Let's be honest, a donut is not healthy. I mean, its deep fried dough usually filled with some super sweet jelly, covered in glaze, then covered in sprinkles. That could send almost anyone into a sugar coma. Again while I was researching on www.puffpastry.com, a receipe definitely caught my eye. Gail Simmons (editor for Food and Wine, judge on Top Chef) had a whole collection of recipes with puff pastry including, PB & J doughnuts. My mouth instantly started to water. Could I even remember the last time I had a donut that wasn't a plain cake donut? (not glaze, no sprinkles....just plain, dry, and almost made me choke). I definitely needed to find a way to make this a little more diabetic friendly.

    PB&J Puff Pastry Donut
    1 egg
    1 tablespoon water
    1/4 cup Simple Jif peanut butter
    3 tablespoons heavy cream
    1 tablespoon confectioners' sugar (Sueshine note: to make powdered sugar with Splenda, mix 3/4 cup granulated Splenda and 2 tablespoons cornstarch. Mix ingredients in a blender until a fine texture. Makes 1 cup of powdered sugar)1 package (17.3 ounces) Pepperidge Farm® Puff Pastry Sheets, thawed
    4 teaspoons Smuckers Sugar Free Strawberry jam

    Heat the oven to 400°F. Beat the egg and water in a small bowl with a fork.
    Stir the peanut butter, heavy cream and confectioners' sugar in a small bowl until the mixture is smooth.
    Unfold 1 pastry sheet on a lightly floured surface. Using a round cutter, cut the pastry sheet into 9 (3-inch) circles. Repeat with the remaining pastry sheet.
    Place 9 pastry circles onto a baking sheet. Spoon about 1 teaspoon peanut butter mixture in the center of each pastry circle. Top each with about 1/2 teaspoon jam. Brush the edges of the pastry circles with the egg mixture. Place the remaining pastry circles over the filling. Press the edges firmly to seal. Using a sharp knife, cut a small slit in the top of each filled pastry.
    Bake for 15 minutes or until the pastries are golden brown. Let the pastries cool on the baking sheet for 10 minutes. Sprinkle with additional confectioners' sugar

    Source: adapted from www.puffpastry.com

    So it's not EXACTLY like a donut but it's as close as I can get to one right now. The fact that it isn't deep fried alone makes it a little better.

    Well that's it for puff pastry week....which actually turned into 2 weeks but until I become famous, I'm stuck at my 9-5, tired and stressed at the end of the day. But that's okay...the wonder that is puff pastry makes it fast and easy for me to make a quick dessert....or even provides memories of what I dream I could still eat. A diabetic girl's dream could come true...I just gotta work at it a little and make it happen myself ;)

    Sunday, April 10, 2011

    Why does Gordon Ramsay keep yelling?

    So puff pastry week got a little sidetracked (had my first real order for cakepops this week which kept me busy!) but I'm back. I knew when I decided to do puff pastry week, I didn't want to limit it to sweet items....I wanted to at least try one real dish. I immediately knew what I wanted to do for my savory dish and it would finally answer my question....why does Gordon Ramsay keep yelling at the contestants on Hell's Kitchen?


    If you have never seen an episode of Hell's Kitchen, I'll give you a quick summary: Contestants have to cook a dinner service under Chef Gordon Ramsay. Contestants must cook quality food quickly, all while Ramsay is screaming his head off. You would think none of the contestants have ever cooked anything in their lives the way he yells and smashes food on the counter. Every season, Ramsay has a few staple dishes that are always on his menu, one being Beef Wellington. So what is Beef Wellington? From what I could see on TV, it's beef tenderloin wrapped in puff pastry. What's so darn hard about that? Apparently everything because you always hear variations of Ramsay yelling after they bring it up to the pass: "IT'S RAAAAW you donkey!!!" I mean, most of it is already prepped before dinner service and all they have to do is throw it in the oven. I wanted to find out if I could do it...me, who maybe has one pinkie bone of natural cooking ability (as previously written, the family cooking gene skipped right over me) but then again, this is baking right.....sorta?


    I did some research on beef Wellington recipes and found there is actually more to it. Like most recipes, there are so many variations. Some have pate or ham (similar to prosciutto) but I didn't want to get too complicated my first time around, especially since I know a lot of my friends and husband are such picky eaters. I did decide to stick to the ingredients that seemed to be a constant of a Wellington: tenderloin, puff pastry, mushrooms, mustard, and pepper. So here we go:


    Beef Wellington


    1 beef tenderloin (1.3lbs was more than enough for 2. I couldn't find a plain ol' tenderloin but I did find a pre-marinated tenderloin....garlic and black pepper)
    Ground black pepper
    1/2 of a 17.3-ounce package Pepperidge Farm® Puff Pastry Sheets (1 sheet), thawed

    1 egg
    1 tablespoon water
    1/2 tablespoon butter 
    1 tablespoon mustard (I used spicy brown)1 cup finely chopped mushrooms
    1 medium onion, finely chopped
    Heat the oven to 425°F.  Place the beef into a lightly greased roasting pan. Season with the black pepper, if desired.  Roast for 10 minutes. (see notes below: what I learned) Cover the pan and refrigerate for 1 hour.

    Reheat the oven to 425°F.  Beat the egg and water in a small bowl with a fork or whisk.

    Heat the butter in a 10-inch skillet over medium-high heat. Add the mushrooms and onion and cook until the mushrooms are tender and all the liquid is evaporated, stirring often.

    Unfold the pastry sheet on a lightly floured surface. Roll the pastry sheet into a rectangle 4 inches longer and 6 inches wider than the beef. Brush the pastry sheet with the egg mixture. Spoon the mushroom mixture onto the pastry sheet to within 1-inch of the edges. Brush mustard onto beef. Place the beef in the center of the mushroom mixture.  Fold the pastry over the beef and press to seal.  Place seam-side down onto a baking sheet.  Tuck the ends under to seal.  Brush the pastry with the egg mixture. Sprinkle coarse sea salt on top of puff pastry (optional).

    Bake for 25 minutes or until the pastry is golden brown .
     Source: Adapted from www.puffpastry.com
    
    Round one of cooking the tenderloin
    
    Sauteed onions and mushrooms in butter


    Mustard coated beef on the mushroom mixture & puff pastry
    
    
    Wrapped in puff pastry, pre-baking
    
    
    After baking
    
    
    Inside (its well done...oops!)


    So what did I learn about making my first beef Wellington?


    1) There is a lot of prep to this dish and it isn't just "wrap beef in pastry."
    2) Instead of roasting it before going into the fridge, I would pan-sear it instead (as suggested on other recipes). One of the biggest problems that I noticed when I watch Hell's Kitchen is that the contestants always have a problem cooking it to order and I can see why. By roasting it, if your tenderloin is small, it will cook pretty fast. If you sear it, it will only brown the outside and leave the inside pretty pink and give you some room when you are cooking it inside the puff pastry. The other issue is that since it's wrapped in puff pastry, its not like you can poke at the beef and check if it's medium rare or well done. No wonder they get yelled at....cooking times could mess this up real bad.
    3) I made two separate ones because the hubby is one of those picky eaters and he likes everything plain. His did not have mushrooms or mustard but he said it was really good (he might be bias though...hehe). He also took a bite of the one with mustard (no mushroom bits) and he said he liked that as well...."it can go either way." Like I always say, adjust to your taste.


    I'd probably get yelled at by Ramsay too. This is courtesy of the Mister who thought it would be funny to play in the background as I experimented:
    http://www.gordonramsayswearsatyou.com/ (Warning: no bleeps here!)
    LoL oh well....I never claimed to be a chef or plan on going on Hell's Kitchen but I think I did very well for Lil Ms. Sueshine playing chef in her kitchen tonight  ;)


    <3 Lil Ms. Sueshine
    Related Posts Plugin for WordPress, Blogger...