Wednesday, November 21, 2012

Drawer Full of Snacks - Cranberry Orange Hand Pies

Everyone has been freaking out about "The Great Twinkie Shortage of 2012" but honestly, Twinkies weren't my favorite Hostess treat back when I use to eat full powered (ie regular sugary) sweets. My favorites were the fruit or pudding pies. You know the ones I'm talking about. They're the ones with the "fruit" in the bright mystery gel encrusted in a white sugar flaked crust? My favorite were the lemon ones. Those didn't even have fruit...just the dayglo yellow gel!
 
Hm, now that I think about, that doesn't sound as appetizing as it did when I was ten. Yet, the idea of having a homemade hand pie does sound appealing. Those Hostess pies are also known as hand pies...pies that fit conveniently in your hand with no utensils required. Especially with it being Thanksgiving week, what better drawer snack to share with you than a cranberry orange hand pie.
 
Cranberry Orange Hand Pies

1/4 cup orange juice
1 tablespoon cornstarch
1/4 cup stevia sugar blend
1 tablespoon grated orange zest
1 cup fresh cranberries, cut in halves
1 package of ready pie crust (usually comes with 2-9in rounds)
egg wash (1 egg, 1 tablespoon water)


Preheat oven to 350*F.
In a medium saucepan, heat orange juice, sugar, orange zest, and cornstarch over low heat. Stir until the sugar dissolves. Add cranberries and coat with sugar glaze. Heat until the cranberries soften but remain whole, about 5 minutes. Remove from heat.
Unroll the pie crust rounds. With a cookie or biscuit cutter, cut shapes front crust and lay on a parchment lined baking sheet. Spoon cranberry orange filling onto half of the crust cutouts, leaving enough edge to seal. Top the pie filling with another crust cutout. Seal along the edges with a fork.
Lightly brush the top of the crust with the egg wash. Poke small holes or cut a tiny slit in the middle of the pie to vent.
Bake for approximately 20 minutes or until the crust is golden brown. Cool before serving.


Have fun with the cookie cutters. I used a maple leaf cutter for the season but they were rather large and only made 4 pies. I ended up with lots of crust scraps so I took one of my mini cutters and made bite size pies so not to waste all the flaky goodness. The very next day, I placed two of them in a plastic baggie and took them to work. They sat in my desk drawer until snack time and I have to confess how my weird mind works sometimes: The image of a whole pie...or even a slice of pie...sitting in my desk drawer just made me smirk. Anyways, I tore myself away from my work computer, took a break to eat my pies. The tart cranberries and sweet orange flavor went nicely with a cup of hot tea in my Little Miss Sunshine mug. They were delicious and perfect for a Fall afternoon. So if you aren't completely tired of pie or cranberries after Thanksgiving, take the time to make these super easy hand pies which I'm positive are more appealing (and healthier) then the neon gel pies.

Wednesday, November 14, 2012

Wordless Wednesday - Walking in My Shoes


Today is World Diabetes Day. The key phrase: "Think Blue, Wear Blue"
 I'm wearing my blue shoes.

For more information about World Diabetes Day, visit: http://www.idf.org/worlddiabetesday/


Monday, November 5, 2012

Drawer Full of Snacks - Caramel Corn

I think a lot of people who have desk jobs have a snack drawer. I know of least 4 people in my department that have one. If you do work at a desk and don't have a snack drawer, once 3 o'clock rolls around, what do you do?! I'm usually ready to crash and need a pick-me-up. Unfortunately, with being diabetic, I don't have the luxury of keeping junk food in my drawer and I have to be a little more picky so my sugars don't suddenly spike. Also not good for a diabetic is not to have emergency snacks. I had just started my insulin shots again and I had gotten lazy about restocking. One afternoon, I started to shake uncontrollably and I had trouble concentrating. My blood sugar was too low and I didn't have anything to eat to bring it back up. I had to run to the store for some orange juice so I could feel like I could function again. It's scary to feel like you don't have control of your body and I certainly don't want to go through that again. I've learned to keep my snack drawer stocked but again, sometimes it's hard to find something to snack on.
 
So with that said, November is National Diabetes Awareness Month and I've decided to focus on some homemade snacks to keep in my desk drawer that might be slightly healthier than what you find at the market. One of the staples in my drawer is popcorn and I know that with all that "butter," it can't be the healthiest thing to eat. But then again, I also want my popcorn to taste like something. I decided to experiment this weekend with plain organic popcorn and a bottle of Sohgave that I recently found at Home Goods.
 
 
Caramel Corn
Adapted from sparkpeople.com
 
1/2 cup Splenda Brown Sugar Blend (equivilent to 1 cup of brown sugar)
1/2 cup of agave nectar (such as Sohgave)
1/4 cup of butter
1 1/2 teaspoons of vanilla extract
1/2 teaspoon of baking soda
1/2 teaspoon of salt
10 cups of air popped popcorn or 2 bags of plain microwavable popcorn*
 
 
Preheat the oven to 250*F. Spray a large baking sheet generously with cooking spray such as Pam.
Pop popcorn and set aside in a large bowl.*
In a saucepan, mix together butter, sugar, and agave over medium heat and stir occasionally. Cook for approximately 5 minutes. Lower heat if the sauce begins to bubble too much or it may burn. Remove from heat and mix in the vanilla, baking soda, and salt.
Pour about 1/3 of the sauce over the popcorn and gently mix so the popcorn is coated. Continue to pour more of the caramel sauce over the popcorn and continue to mix.
Once the popcorn is coated, spread onto your baking sheet in an even layer.
Bake in the oven for 30 minutes. Approximately 15 minutes into the baking time, stir to avoid burning or sticking.
Remove from oven and stir gently to break up any clumps. Cool before serving.
 
 
*Sueshine Notes
-I stared at all the various popcorn brands in the snack aisle for a long time before settling on plain microwavable popcorn because 1) I didn't have an electric air popcorn popper 2) Everything seemed to be either "movie theater butter" or kettle corn flavored. I went with Albertson's Wild Harvest popcorn because it was organic, unflavored, and has no trans fats or artificial flavors.
-I made the mistake of not separating the kernels from the popcorn before I started. The end result was the kernels sinking to the bottom of my baking sheet and sticking to the caramel. Talk about trying not to chip a tooth when you're distracted with all the sticky goodness! So in other words, please take the time to let the kernels settle to the bottom of the bowl then dump them out.
-Unless you have a giant bowl that can hold two bags of popcorn, I recommend mixing in smaller batches. My puppy thanks me for not realizing this earlier and dropping a few stray pieces all over the kitchen floor.


I've missed caramel corn and this was certainly a suprising treat. This was the first time I used agave nectar and it served as a great substitute to corn syrup. One new snack in my desk drawer....I can't wait until 3 o'clock!
 
 
note: I'm not a doctor or nutritionist. You know your dietary restrictions and your body so be sure to keep with your doctor's plan for you. Also, remember to eat your snacks in moderation

Saturday, October 20, 2012

Happy 5th Anniversary - The Tradition of Throwing Cake


Today is me and Scott's 5th wedding anniversary. Instead of getting all mushy on you, I wanted to share some pictures of our cake cutting...and smashing....and throwing.
 
It was guaranteed that my husband was not going to be gentle when it came to feeding me cake. As the piece of shared cake was placed on the plate, I braced myself. It seemed like slow motion as he approached me with a piece of cake....then smeared it across my forehead and hair. Then he took off running.
 
 
I think guys easily don't realize how long us ladies sit at the salon on our wedding day, getting our makeup and hair done. I decided to fight back. According to our guests, my husband made a break for the patio door....but not before I threw a piece of cake and hit the back of his head! I must have been so caught up in the moment because til this day, I really don't remember throwing cake. He looked into the room through the window and I indicated that he needed to come back in. He voluntarily let me smash cake in his face.
 
 
I cleaned up shortly after but I smelled like marshmallow frosting for the rest of the afternoon.
 
 
Five years later, we still have our playful relationship. Even as I write this, he's sitting on the couch, mimicking what he thinks is my voice (his version is much squeakier), and fake typing on his lap so he can get my attention.  I have to admit, it makes me giggle every time he does it.
 
I married my best friend that day and I look forward to many more years of happiness and shenanigans to come!

Wednesday, October 17, 2012

Hello Autumn! - Pumpkin Nutella Rolls

Most people get cash tips for their work. My husband (a locksmith) got a pumpkin. I didn't believe him at first when I got the text in the middle of the day but when I got home, there sat a small pumpkin on my kitchen work station. Hmm okay. Other than carve and eat things made with pumpkin, I haven't actually cooked one. What on earth was I going to do with something that I've never worked with? I decided to start with making pumpkin butter and hope I would get inspired somewhere along the way.


Homemade Pumpkin Butter
adapted from fitsugar.com
 
1 small to medium sized pumpkin (about 5lbs)
1/4 cup apple cider (I used light/no sugar added apple juice)
2 tsp cinnamon
2 tsp pumpkin pie spice
2 tsp stevia or agave (I used stevia for this recipe)
 
Preheat the oven to 350*F.
Cut the pumpkin in half and remove seeds and "guts." Line a roasting pan with tin foil and drizzle with olive oil or spray with cooking oil. Place the halves on the pan, face down.
Bake for 1 1/2-2 hours (check your pumpkin occassionally. IMO, without turning over the pumpkin, it will be done when the outer skin starts to darken and wrinkle). Allow to cool.
Scrape the contents of the pumpkin into a bowl. Mix in apple cider, cinnamon, pie spice, and sweetener.
Boil in a sauce pot over medium high heat. Reduce heat and simmer for 30 minutes. Stir until the puree is smooth and cool. Store in an air tight container such as a mason jar.
 
On the site, suggestions for the pumpkin butter was to put it on top of pancakes, waffles, bread, oatmeal, and yogurt. Do you see the trend that I saw? It seemed like it was a good compliment to breakfast so I decided to use the pumpkin butter for cinnamon rolls. But what if I put it inside instead of on top? Oh oh and what if I added chocolate chips which I had heard was a great combo with pumpkin? (can you believe I've never had a pumpkin chocolate chip cookie?) Darn, I was out of chocolate chips....but never out of Nutellla! Oooh my mouth was watering already!
 
Pumpkin Nutella Rolls
1 box of Pillsbury Hot Roll mix (hot water, 1 egg)
1/3 cup of Nutella
1/2 cup of pumpkin butter
1 tablespoon brown sugar
Butter or margarine (for top)
 
Follow directions on the box to make the dough. (Yes I know that some of you may think baking from a box is cheating but I don't judge. Baking from a box is fine but I always suggest you get creative and jazz it up!)
Roll dough out thin on a floured work surface or on parchment paper.
Begin spreading thin layers of Nutella then pumpkin butter on top of the dough. Sprinkle brown sugar on top.
Tightly roll the dough, tucking and pinching as you go.
 
 
Tip for cutting: Get a long piece of dental floss. As shown in the center picture above, tuck it under the log, criss-cross the floss, then pull. The floss will easily and cleanly cut through the dough. Repeat cutting 1 inch thick pieces.
Lay the cut pieces on a parchment lined baking sheet about an inch apart. Lightly cover with plastic wrap and allow the dough to rise for about 20-25 minutes. Meanwhile, preheat oven to 375*F.
Brush soften butter or margarine on top of roll. Bake for approximately 15-20 minutes or until golden brown. Cool on wire rack.
 
Okay, I know this recipe takes a LOT of time and effort but it will be worth it in the end. Most rolls have some kind of icing on top and I honestly believe this doesn't need it because all the sweet goodness is already inside. My only suggestion is if you do want to top it off with anything, serve warm and add a little more butter to keep it moist.
 
 
Holy moley these turned out better than I expected. I'm so happy that this was the first thing I made for the Fall season! I hope you'll at least try to make the pumpkin butter. If you're a pumpkin fan, I promise you'll want to put it on EVERYTHING.  Happy Fall baking everyone!


Thursday, September 13, 2012

Last Bite of Summer - Olive Oil Blackberry Lemon Shortbread


It's been a very warm summer in San Diego. The AC in my tiny red kitchen often read in the high 80s, low 90s and the few times I did dare to turn on the oven, it would slowly approach the 100s. Even after the oven was off, it would take hours for my house to "cool" down. I started baking at night but then I wouldn't have the light to take pictures to share with all of you. I missed out on making quite a few summery treats because I just couldn't bring myself to do it.
 
A few weekends ago, I couldn't resist the urge anymore. The oven was just calling to me! If I was going to brave the heat, I was going to make something summery. Last Spring, I tried a shortbread recipe that used olive oil rather than butter. Isn't that what makes shortbread so tasty....all that buttery goodness? This couldn't possibly be as good but to my surprise, although it tasted pretty different from traditional shortbread, I enjoyed it. But what could I do to the recipe to bring it up another level, still stay a little healthier, and remind me of summer. When I saw the fresh blackberries in the market, I knew I wanted to make something reminiscent of a berry lemonade with fresh mint.


Olive Oil Blackberry Lemon Shortbread

Shortbread
2 cups whole wheat flour
1/2 teaspoon baking soda
1/4 teaspoon salt
1/2 cup sugar (I used 1/4 cup Stevia)
1/3 cup light olive oil
1 large egg
2 1/2  tablespoons honey
2 teaspoons grated lemon zest
1 cup blackberries, sliced in half

Glaze
3/4 cups Stevia
2 tablespoons cornstarch
4 teaspoons lemon juice
1/2 teaspoon lemon zest
3-5 mint leaves, crushed
 
Preheat oven to 350F.
Combine baking soda, flour, salt (Do not sift) on a large piece of parchment paper.
Separately, beat sugar, egg, olive oil, and honey until combined. Add lemon zest and using the parchment paper, gradually add the dry ingredients. Incorporate the blackberries.
Place dough on the parchment paper. Press the dough together with the parchment paper and make into a log. Twists the ends and refrigerate for 10-15 minutes.
Cut the log into 1 inch thick rounds. Place on a parchment lined cookie sheet and bake for 10 minutes. Cool on a wire rack.
In a saucepan on low heat, combine all ingredients for the glaze. Simmer for 5 minutes or until it bubbles. Remove from heat. Brush glaze onto cooled shortbread. Allow the glaze to cool on the shortbread before serving.


Sueshine Notes
Measurements and ingredients have been changed from the original recipe to make it my own and to bring up the sweetness level.
After you add the flour mixture, the dough will be very dry. Do not panic. The blackberries will moisten the dough and will help bring it together in the parchment paper.
Another option for the cookies it to roll out the dough and use a cookie cutter to make different shapes rather than the log.
The color of the dough and finished cookies will be a little shocking and maybe not so appetizing when you first take them out of the oven. I wondered how on earth I could make this look good for you guys but after I brushed on the glaze and let the cookies sit for a bit, the lovely purple color came out.


Sometimes I wonder if I really am a San Diego native because I'm glad summer (at least this miserably humid summer) is drawing to a close. I cannot wait for Fall (my favorite season) to start! I have the next 3 months planned so I hope you're ready to see my oven finally go into overdrive!

Tuesday, August 28, 2012

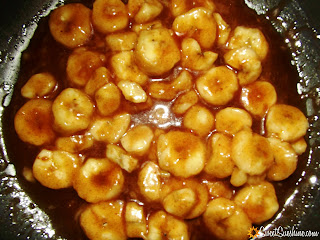
Satisfied Cravings: Bananas Foster

Cravings are a constant challenge when you have dietary restrictions. You know that saying, "You always want what you can't have"? What I usually want is dessert and for the first time, the dessert I craved was something that I've never actually ordered, made, or even have a special memory of. I just knew that I had to have it.
 
If you've read my blog for awhile, you know that I love puff pastry. While I was looking for new recipes on puffpastry.com, I ran across a recipe for bananas foster. Bananas Foster is bananas covered in buttery-cinnamon-rum-caramelly (yes, not a word but it should be) goodness. Traditionally bananas foster goes over vanilla ice cream and although ice cream sounds delicious during these recent hot summer days in San Diego, sugar-free ice cream is one of those few items that I don't think has been mastered just yet. I crave bananas a lot but like a lot of fruit, I have to limit my intake because of the natural sugars and in the case of bananas, the starch.  I looked over the recipe and decided to make a few adjustments to the ingredients and the portion size to see if I could make it a little more friendly.
 
 
Bananas Foster with Puff Pastry
heavily adapted from puffpastry.com
 
1 package of mini puff pastry shells
egg wash - beat 1 egg, 2 tablespoons water
3 ripe, but firm, bananas
1/2 cup sugar substitute*
2 tablespoons light maple syrup
2 tablespoons of butter
2 tablespoons dark rum
1 tablespoon lemon juice
1/2 teaspoon cinnamon
1 cup of vanilla Greek yogurt
 
 
Preheat oven to 425F.
Place pastry shells on a baking sheet lined with parchment paper. Brush the egg wash onto the puff pastry shells. Bake for 10 minutes or until golden. Cool.


Cut bananas into rounds.
In a skillet, combine the sugar, syrup, butter, lemon juice, rum, and cinnamon over medium heat. Stir until the sauce thickens. Add the bananas and coat until caramelized.


Remove the centers of the puff pastry shells. Spoon in the Greek yogurt and add the banana mixture to the top. Add another layer of yogurt to top if you would like.
 
Sueshine Note
*The original recipe called for 1/2 cup of packed brown sugar. Instead, I used C&H Light which is a combination of real sugar and stevia and the 2 tablespoons of light maple syrup. This sugar substitute does not measure equal to real sugar (1/2 cup = 1/4 cup) so make sure you adjust to whatever substitute you are using.
*Worried about the alcohol? It burns off but if you are worried about the sugars in the rum, you can use imitation rum extract.
 
I decided to go with the smaller puff pastry shells because it lends itself to a smaller portion. I believe one of these is the perfect size dessert for after dinner and there is a little less guilt involved. Did I mention how easy this recipe was too? You can whip this up in a matter of 15 minutes and even less time if you are just making the bananas foster portion. I actually had some extra bananas so I might save it for that sugar free ice cream that needs improvement.


I forgot to show what the puff pastry shell looks like when it's baked as well as the hollowed section filled with yogurt but I just got too excited to pour on the bananas and sauce! Do I have you craving bananas foster now? :)


Please note as with all my attempts in making a recipe more friendly, I'm not an expert. Please make sure you take into account your personal diet. Only you can make the right decisions.
 

Wednesday, August 15, 2012

Happy Birthday, Julia - Cherry Clafoutis

Friday, July 13, 2012...in my little red kitchen I stared down at one of the saddest baking attempts I've done since I started my blog. It was the day before the next San Diego Food Blogger's meeting and it was declared that there would be extra points if you could make something in honor of Bastille Day. I'll be honest with you...I had to look it up Bastille Day. Hmm....I didn't know much about French food so dessert it is. Back to the internet and I finally decided on a cherry clafoutis (cla-foo-tee) because in the end, I wanted to have an excuse to buy a bag of pricey cherries. I gathered my ingredients and made my atttempt at making a random French ,dessert which I had never even tried before. It wasn't an epic fail (it actually tasted really delicious) but in looks, it was definitely a fail. I brought a creamy avocado dip and pita chips to the meeting...hehe.

So what is a clafoutis? The best way to describe it is a cross between a pancake and a flan. Juding by all the receipes I found, there are several versions but most were pretty basic and straighforward. Traditionally it's made with unpitted cherries to give it an almond-like flavor but I decided I better pit mine. Let's just say my hands were a little stained afterwards. As I said, I enjoyed the flavors of the failed clafoutis so I knew I would eventually revisit it again in the future.

I would try it a lot sooner than expected. A little birdie had emailed me and told me about a local restaurant that was holding a special dinner for Julia Child's 100th birthday. I honestly haven't thought much about Julia Child in recent years but I do have memories of sitting on my grandmother's couch and watching cooking shows like In Julia's Kitchen with Master Chefson PBS *gasp* pre-Food Network. I can tell you I am no expert at French cuisine and I can only dream to master a few French pasteries. When she wrote Mastering the Art of French Cooking, Julia introduced Americans to fine dining and that as long as you liked to cook or wanted to learn to cook, you could do it. Today is Julia Child's 100th birthday in in the spirit of wanting to learn how to cook/bake, I decided to try the clafoutis a second time.

Julia Child's Cherry Clafoutis
from Epicurious.com
Preheat oven to 350 degrees F.
Using a blender, combine the milk, 1/3 cup sugar, eggs, vanilla, salt and flour, and blend.
Lightly butter an 8-cup baking dish, and pour a 1/4-inch layer of the blended mixture over the bottom. Set remaining batter aside.
Place dish into the oven for about 7-10 minutes, until a film of batter sets in the pan but the mixture is not baked through. Remove from oven (but don’t turn the oven off, yet).
Distribute the pitted cherries over the set batter in the pan, then sprinkle with the remaining sugar. Pour the remaining batter over the cherries and sugar.
Bake in the preheated oven 60 minutes, until the clafouti is puffed and brown and a knife inserted into the center comes out clean.
Sprinkle with powdered sugar and serve warm.


As I've stated in previous posts, I will always be honest with you when I try baking something new. I'm not a professionally trained baker or a master at pasteries...I'm just an everyday at home baker, learning as I go. I think a lot of you are in the same boat as I am. The cherry clafoutis didn't turn out super pretty (better than my original attempt though) but it was so good. Mine did not turn out puffy like a pancake but leaned more towards a firm custard which I believe I prefer. The tart cherries were a contrast to the sweet eggy batter and I had to stop myself from spooning more into my mouth. Who knows why my clafoutis turned out the way it did...maybe it was my sugar (I used C&H Light which is a sugar/stevia blend and not an exact measure to real sugar) or maybe it was my baking dish (glass) or it could even be my oven. Either way, I'm glad I tried again and I'm sure I will try it a third time later down the road. In Julia's words:

"Maybe the cat has fallen into the stew, or the lettuce has frozen, or the cake has collapsed. Eh bien, tant pis. Usually one's cooking is better than one thinks it is. And if the food is truly vile, then the cook must simply grit her teeth and bear it with a smile, and learn from her mistakes."

Happy 100th birthday, Julia! All the chefs, bakers, and everyday cooks that you have inspired thank you. Bon Apetite!


Wednesday, August 1, 2012

"C" is for Cookies....for Cody


This was supposed to be a Wordless Wednesday post but I think you'll forgive me for this one. I'll always make time to bake especially if its for a great cause.
Cookies for Cody is an online bake sale and cookbook auction to help The Recipe Renovator's nephew, Cody, a brave 4 year old boy who is fighting neuroblastoma, a rare childhood cancer. Follow the link to learn more about Cody and how you can contribute.

About the photo above: I struggled to take the right picture for my rum cake because it was late at night and no good light in sight. I submitted another picture for the auction but as I looked at almost 20 different pictures of my cake from all kinds of angles. I had cut into it to make sure my cake tasted right and maybe get a picture of the center.

I didnt realize until later that I had snapped a picture of a "C" .....for Cody.
If you would like to bid on my item, please click:
Thanks to everyone who is participating in the auction. Please spread the word!

Wednesday, July 4, 2012

Wordless Wednesday - Celebrating the 4th with Cake


Nothing says summertime like a berry lemonade cake decked out in patriotic colors. Have a wonderful and safe 4th of July everyone!


Sunday, June 24, 2012

Bring on the Savory!!


The intense smell of chocolate cake just before the timer goes off. The sweet yet slight tang of cream cheese frosting in your mouth. The feel of sticky cakepop mix coating your palms as you roll. The sight of dozens of fresh baked cookies cooling on a wire rack.

Working overtime!
These are the senses that have filled my kitchen lately as I've baked like a mad woman for the past month. No, I still do not own my own business but I gladly bake cakes, cookies, cakepops, and whatever wonderful sweets my friends and family ask me to bake. Apparently I have my breaking point though because last week, as I was rolling several dozen cakepops, I suddenly could not stand the smell of strawberry cake and frosting. The feel of the mix made me feel queasy and I couldn't wash my hands enough times. So what does this all mean? I'm obviously not giving up baking sweets for everyone but I know I want to try my hand at baking a few savory items for awhile. I actually tried the recipe below, took pictures, and was ready to share with everyone but somehow it got pushed to the side and sat on my laptop files for 10 months.

Call me a weird but I loved stuffed mushrooms as a child. My mom would always order it as an appetizer when we would go out to eat. The memory of bubbly cheese on top of crab, onion, and bread crumbs still makes my mouth water even as I type it. I always knew I wanted to make stuffed mushrooms for the blog but as much as I love the traditional flavors, I wanted to make a different version.

Stuffed Mushrooms with Feta, Spinach, & Bacon
heavily adapted from Bon Appetit

Approximately 4-5 slices of turkey bacon
1 small onion, chopped
1 10-ounce package of chopped frozen spinach, thawed and drained
4 oz crumbled feta cheese
4 oz cream cheese, room temperature
1/4 teaspoon crushed red pepper
Mushrooms of your choice (Recipe calls for large button mushrooms but portobellos would work great), cleaned and stemmed
Olive oil

Preheat oven to 375°F. Cook bacon (in a pan or microwave...however you cook your bacon) until crispy. Drain bacon on a paper towel and crumble when cool. Set aside. 

Sueshine note: Turkey bacon does not product much grease. If for some reason it does or if you use regular bacon for this recipe, discard any excess and leave enough to lightly coat the bottom of your pan.


In the same pan over medium head, add 2 tablespoons of olive oil and cook down the chopped onion until soft. Transfer to a bowl and once cooled, mix in spinach, bacon, feta, cream cheese, and crush red pepper. Add salt and black pepper to taste.

Sueshine note: Although the original recipe called for salt, I chose not to add salt to any part of this recipe because the bacon and cheeses added enough.


On a foil lined baking sheet, drizzle olive oil over the mushrooms. Bake with the round sides down for 25 minutes or until the center is filled with liquid. Turn the mushrooms and cook for another 20 minutes.


Generously add filling to the mushroom caps. Bake for 10-15 minutes. Serve warm.

I didn't make too many of these when I made the recipe because Scott probably would have looked at me funny if I even attempted to have him taste it. I didn't have a party or family gathering to attend so I had a ton of filling. If you are not a fan of mushrooms like the hubby, another great use for the filling was for a baked potato. I refrigerated the extra filling in a tightly sealed container and the next morning before work, I stopped by the grocery store and grabbed one of those ready to microwave potatoes available in the produce section of some stores. I microwaved my potato for about 7 minutes and dropped a good helping of the filling into it. My co-workers were ooo-ing and ahh-ing when they saw it and was asking me what I had made. Whichever you use the filling for, its delicious! Now this version of stuffed mushrooms is making my mouth water. I might have to make a batch (10 months later) just to satisfy my savory taste buds.

Sueshine note: Stay tuned as I learn to make a few more savory baked items. This should be...interesting *wink*


Wednesday, June 6, 2012

Wordless Wednesday - Yes, this is cake


Can you believe this is cake? On a recent trip, I got to see some of Flora Aghababyan's cakes, an award winning cake artist at the Wynn, Las Vegas. Simply amazing.

Wednesday, May 30, 2012

Mmm Beer - PubCakes!!

Work. Family obligations. Chores. Bills. Grown-up type stuff. Breaking a leg. Life always seems to get in the way of the things you want to do. For myself and the hubby, one of the things we want to do the most is just relax for a minute....and have a beer.


When I first started dating Scott, I was your typical girl in her early 20s, drinking a bunch of frozen frou-frou drinks or doing multiple rounds of hard shots between dancing like a maniac into the wee hours of the morning...on a Tuesday. I remember him asking me if I drank beer and I'm pretty sure I made a yuck face. Does hard cider count? I'm sure he made a yuck face that moment too. Shortly after, Scott was determined to give me a beer education.

So what does this all have to do with a baking blog? One trend in baking is to turn alcoholic drinks into cupcakes. I've seen margaritas, red wine, mojitos....you name it, someone has turned it into a cupcake. When I started seeing cupcakes using beer, I instantly became curious. Beer? Really? I had to find out for myself what a beer cupcake would taste like.

I found out about PubCakes a few months ago when they participated in The College Area Taste. Unfortunately, I wasn't able to attend because I was still recovering from the broken leg but I always kept it in the back of my mind to look them up when I was better. Since PubCakes is only a few minutes from our house, I decided we would pop over really quick and give Scott a little beer cupcake education.


PubCakes shares shop space with Treehouse Coffee Co.

On top of the counter, yummy cupcake flavors of the day sit under pretty
domes, waiting to be eaten.

Pubcakes rotates their cupcake flavors so be sure to check out their website to see
what's baking for the day. Pictured above (top to bottom):

Top Ten Cake: Karl Strauss® Tower Ten IPA, cayenne caramel, cherry, and ancho chilies
Beer for Breakfast: AleSmith® Wee Heavy, bacon, and maple cream cheese frosting
Stoned Portzilla:Stone® Smoked Porter, coffee ganache, and caramelized coconut

I love the way the cupcakes are displayed among a collection of bottle caps. From top to bottom:

Poquito Bandito: Negra Modelo® cake, Cazadores® Tequila and lime buttercream, and fried tortillas tossed in Tajin®
Super Pretzel: Bear Republic® Big Bear Black Stout chocolate cake, pretzels, peanut butter
 buttercream and a chocolate shell
Punkin' Vegan: North Coast Brewery® Old Stock Ale, pumpkin, and maple whipped frosting

Cupcakes come in 2 sizes.....Scott opted for the large ($3.50) Super Pretzel. He loves his chocolate and peanut butter combo! He enjoyed the cupcake but he is still doesn't get the whole pretzel thing.
I really do need to give him an education in salty/sweet.

I opted for the mini cupcakes ($1.75) and a glass of water (free)
Poquito Bandito and Stoned Portzilla.
I preferred the Poquito Bandito and if I could (which I cant *sad face*) I would eat their lime buttercream straight from the mixing bowl. Scott even enjoyed this one and he rarely ventures far from what he knows.

If you aren't a beer drinker, don't be scared to try PubCakes cupcakes. If someone didn't tell you there was beer in these, I don't think you would be able to tell. Who knows, PubCakes might turn you into a beer drinker. These were delish and I would recommend dropping by this cute little shop. Speaking of a "little shop" don't forget to visit the PubCakes website and VOTE for them in Chase/Living Social's Mission: Small Business. Although you can already find PubCakes cupcakes in a few few locations around town or visit their shop in La Mesa, by voting for them, they have an opportunity to win a grant to open a bigger shop. They're approaching their goal of 250 votes but why don't you take a few moments to push them right over the edge? I don't know the owners of PubCakes nor have I ever met them but I'm all for supporting local small businesses, especially when they make excellent cupcakes! I know how it feels to really want something really bad...even if it is just a moment to enjoy a beer.


PubCakes
7229 El Cajon Blvd.
San Diego, CA 92115
Hours: Wed - Sat, 10:00AM - 7:00PM, Sun, 10:00AM - 5:00PM
www.PubCakes.com


*Cupcake descriptions are from the PubCakes website

Thursday, May 3, 2012

San Diego Food Blogger Bake Sale 2012 - Video Recap

The bake sale as a complete success! Watch my video to see just some of the yummy items that were available. Thank you to all of you who made it out to the bake sale and I hope you come back next year!


Related Posts Plugin for WordPress, Blogger...